How to Design Budget Tablescapes that Look Expensive
Last week in Tablescapes: Budget Table Settings that Look Expensive, we learned 8 different ways to buy budget tablescape supplies. If you haven’t read it already, go check it out. Now, we’re going to learn how to take all those thrifty table setting items and put them together into frugal tablescapes that look expensive (but won’t break the bank).
The first part of creating gorgeous magazine-quality tablescapes on a budget is to start with frugal supplies that look expensive.
The second part is knowing how to design and arrange your inexpensive materials for maximum impact, as well as extra tablescaping tips and tricks of the pros. Follow our step by step instructions below to learn how to design budget tablescapes.
Design Your Tablescape First
1. Decide on which colors you want to use. Stick to no more than 2-3 colors.
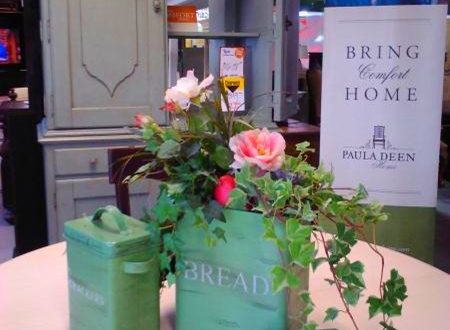
2. Pick a centerpiece. Often, the centerpiece you choose will determine what the rest of the table setting looks like. Choose a vase of flowers, a potted plant, a tabletop mini water fountain, a ceramic statue, a filled basket, a candle holder, or something similar.
3. Set out all supplies and make sure you have all the pieces you’ll need. Although you have many options, only choose the items you want to use:
- Large Plates
- Small Plates Tip of the Pros:
Use a beveled mirror circle or square under your centerpiece to add visual depth to your tablescape. - Bowls
- Chargers
- Centerpiece
- Tablecloth
- Table Runner
- Placemats
- Napkins
- Napkin Rings
- Glasses
- Tea cups and saucers
- Flatware (Silverware)
- Candles and candle holders
- Flowers and vase
- Place cards
- etc.
Tips for Magazine-Quality Tablescapes
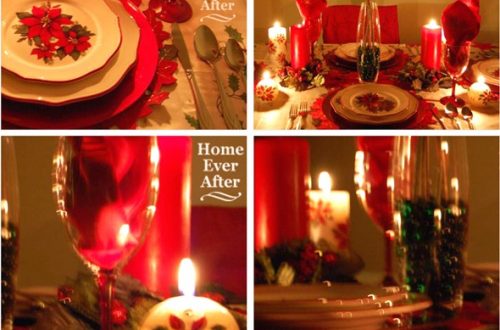
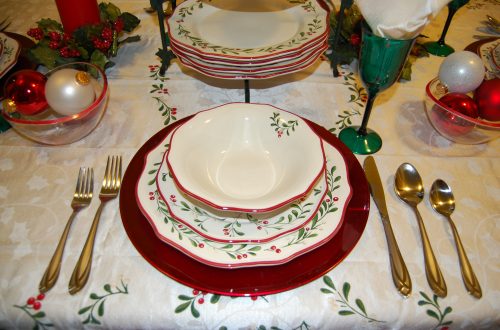
Your supplies don’t have to cost a lot to look expensive. As mentioned in part 1, make sure you opt for “rich” materials with unique touches. The key to designing lush magazine-quality tablescapes is to layer your materials. Linens will be layered on top of other linens, dishes will be stacked upon other dishes, etc. Here are some magazine table setting tips that you’ll want to remember:
1. Use a beveled mirror circle or square under your centerpiece to add visual depth to your tablescape.
2. Your centerpiece doesn’t have to be only one item; it can be a collection of items. Use a grouping of candles, a collection of ceramic figures, etc.
3. If using a floral centerpiece, use one extraordinarily tall stem of flowers along with regular height stems to draw the eye upward and really make a statement.
4. Tie the centerpiece into the place settings by sprinkling something complementary around the centerpiece. This could be flower petals, glitter, confetti, silk leaves, or anything else that matches the decor.
5. Ivy bowls are an inexpensive decorative touch and can be used to hold other items. Line them with cloth napkins, then fill with favors, silverware, flowers, potpourri and more.
6. Mismatch dishes with unique vintage and antique pieces to add variety and make your setting interesting.
7. Use different shapes of chargers and plates. A square charger and round plate look nice together, just as a round charger with a scalloped plate contrast well.
8. Use 2 place mats at each setting and layer them. For example, a rectangular red mat placed normally could be accented by a plaid cloth napkin place beneath in a diamond shape.
Next, read How to Properly Set a Table, with step by step instructions on how to put together a tablescape and proper etiquette for arranging formal place settings.


22 Comments
Lisa
I love the idea of layering the placemats- I hadn’t thought of that before!
angela
thanks for the great tips so many times we will find great items at thrift stores and not know how to display
Emily
This is a great checklist. We often opt for floral tablecloths in colors that coordinate with our other decor. Then we use a centerpiece such as a large candle, several candles, a large vase, etc. Once, we set floating tea-candles into a large urn of water for a Christmas party. That was beautiful! It’s a challenge to make a beautiful table for large gatherings when you’re preparing for 15, 20, or 30 people.
ellen b
What great tips…
Thank you
Mid-Atlantic Martha
What great suggestions! Thanks for the share.
KBeau
All great tips. I’m going to have to go back and read your buying tips.
abeachcottage
oooh, some good tips here
happy tablescaping
Sarah
Susan
great tips! Happy Tablescape Thursday ~ Susan
Marty
What a great tutorial. I am in the very beginning learning stage of tablescaping. Some really creative and helpful suggestions. I so look forward to the next post on tablesetting. Great information. Thanks for sharing. Hugs, Marty
Chandy
I’m glad I already do most of these tips! Yay! Subscribing to Better Homes and Gardens and Good Housekeeping are paying off. 😉
Chari
Hello…
What a wonderful and informative post! I’m always “up” for more tablescaping ideas! It’s funny…I’ve got a future tablescape in planning mode and have thought to use 2 placemats…layering them for more color! Sheeshhh…and I thought my idea was an original one…hehe!!! Thanks again for all of the great ideas!!!
Warmest wishes,
Chari
Kim
Great info! Thanks for sharing it.
Pingback:
Sunny
Barbie, Thank-You so much yet again for the BEST ideas. It goes to show to use what you have and round things out using yard sales, thrift shops, and flea markets……That is what I do!!!
I am complimented , all of the time on most things in my home…..I like to have different items from what most people have with the cookie cutter items. I have always wished to have all kinds of different things, and my Artistic side does peak out and show itself all of the time!!!
Thank-You again for giving everyone such good ideas, and for helping so many people.
Sincerely Yours, Sunny 😀
CyberGwen
Love the tips!
I find when it comes to tablescaping, it is really time to think outside the box. There are very few things that can’t go on the table, it is all about scale. The favorite scape that I have done was for New Year’s Eve. I took some extra black velvet that I had around, threw is over a box for some height, and then placed my grandmother’s old rhinestone costume jewelry around it. It sparkled and shined once I placed some candles on the table.
CyberGwen
I don’t think that I did take pictures, but I will the next time! So many times I get so excited about the doing of projects, that I forget to take photos of the before and after. BAD Gwen!
Pingback:
Farah
What a great tuotorial it is… I am desoeratly in search for a good hints about tablescaping… and you did it in a fab way… easy to understand … and interesting to read… not like a burden to read… My heartly thanks for sharing it… I am going to follow you too
Hope you would like to pay a visit to me at
http://craftaworld.blogspot.com/
Love
Farah
Lauree Sayne
I love your checklist and the layering, it adds so many opportunities for variety! Even though this post is a few years old, it still works. I’m going to feature it on my page later this month. https://www.facebook.com/DancingDishAndDecor